.jpg)
How do they make a Katana?
Making a real traditional Japanese sword can take several months. A katana is known for its beauty, sharpness and strength and a lot is involved in making it this way. In Japanese history , this sword has played a very important role in culture.
But how exactly does a master smith make such a sword strong, sharp and beautiful to look at?
Forging a Katana is almost a craftsmanship with several steps. It starts with many rituals set up by the blacksmiths with a Shinto altar where prayers and purifications were made before the real craft work started.
Here we will explain how this process went with the various steps.
Phase 1: Kitae or forging of the steel
The steel of the blade is made from Tamahagane , which is obtained from iron ore and charcoal. The blacksmiths have a lot of work to make this. This iron is extracted from black ferrous sand ( satetsu ), by heating it in a tatara (traditional oven) to a very high temperature of about 1400 degrees. The result of this process and the mixing parts is the traditional Japanese steel or Tamahagane . Tamahagane (玉鋼) means tama or precious and hagane is steel. Every blacksmith has his own preference for a certain composition and ensures that the swords have their own unique appearance.
Not all steel from the Tatara is immediately suitable for making a Japanese sword. The steel from the Tatara is Kera with a large variation in carbon content. Different types of steel are chosen for the katana blade to give the blade optimal strength and flexibility. Used in the core with low carbon steel hocho-tetsu ( shingane ). For the exterior, the blacksmiths select the parts with a high carbon content ( kawagane ) so that they are as strong as possible and can be sharpened with a sharp edge.
.jpg)
A Japanese blacksmith ultimately receives a block of raw steel or tamahagane and forges it into a katana blade. The blacksmith will heat, hammer and fold this block of steel to get it to the correct structure and shape.
First, the chunks of tamahagane were broken up and allowed to quench in water. Then these were broken into small flat pieces.
The blacksmith made a kind of waffle with a handle to create a teko (forging tool) with which the steel could be forged into a basic shape. The stacked Tamahagane were covered with ash and clay for protection. This was heated in a furnace and hammered out. To distribute the carbon content evenly, the steel was folded, which also caused the impurities to disappear.
.jpg)
The Tamahagane was folded while it was red hot from the oven by making a notch in the center and folding it widthwise and lengthwise. This usually happened 6 to 8 times. Also , the varying hardnesses in the layers made the steel tougher as a result of folding.
This basic forging or Shita-gitae was done by the Tosho ( Yokoza , master) and his disciple ( Sente , helper) who worked together to hammer away at the steel with which the blade is forged.
The purpose of katana blade folding
Tamahagane loses carbon through repeated heating and folding . Too high a carbon content causes the steel to crack quickly, because it is too hard and therefore brittle. The master blacksmiths checked with their eyes whether the steel contained the right amount of carbon, which makes sword making almost an art. Folding multiple times also creates Ji-hada or surface patterns such as itama or masame . A blacksmith will use this technique from Tsumi wakashi (stacking and heating) to obtain different samples.
After this phase, four steel types with different carbon content will be selected: Shingane ( center metal ), Munegane (back metal), Hanokane (edge metal) and Gawagane (side metal).
Ultimately, all these types of steel are forged together, with the different hardness and flexibility of the parts ensuring that optimal use is made of the steel properties in this rough form of the samurai sword. The teko , which served as a kind of lollipop stick, is then removed.
.jpg)
As has often been mentioned, forging is a true art form and the various techniques such as Karajime or cold forging is a true craft. With a light hammer or kozuchi , the shapes are roughly applied and the shinogi line appears and a straight sword and the correct proportions are ensured.
During Sunobe (heat forging) the blade takes even more shape and this steel is carefully hammered out with a kozuchi (hammer). The sword blade now really takes shape by forging with heat ( hizukuri ), where the mune (back) and hirachi are beaten to get length and the blade to the correct thickness. You can now clearly see the shinogi , shinogi-ji , nakago and kissaki slowly developing.
Phase 2: Yaki-ire or tempering
In preparation for Yaki-ire or scaring the blade into the water, the blacksmith now applies Tsuchioki . Every blacksmith has his own recipe for this, which also gives the sword the appealing hamon . Most blacksmiths use a layer of clay ( yakibsuchi ) and cover the katana blade with it. Yakibsuchi is a mysterious mixture of water, clay, ash and other ingredients. Every blacksmith often keeps the recipes secret. These yakibsuchi are applied over the entire leaf surface, thicker along the mune or spine and much thinner on the ha or cut.
This is a very difficult and extremely important aspect of the katana making process. The hard edge ensures that it can be sharpened very sharply, but the sword as a whole will not break easily.
During the yaki-ire, the Tosho will darken the workshop so that he can clearly see and assess the color of the sword steel. This is where the real craft and art of sword making emerge because the smith must determine the temperature of the steel based on the color of the steel so that the tempering will be successful.
The blacksmith will often choose twilight for this so that everything is clearly visible.
The blade with Tsuchioki will again be heated red-hot in the charcoal fire ( hodo ) to approximately 800 degrees. As soon as the katana smith determines the correct steel color, the blade is quickly dipped in water and the steel cools quickly and the blade will warp slightly. During yaki-ire, the edge of the katana blade is turned downward and the blade is horizontal.
.jpg)
Usually, after this process, the tosho will check the yakiba for possible cracks with a rough grinding stone . The surface of the katana is now very hard and this phase is called martensite .
The purpose of the Tsuchioki is now to ensure that the back cools down less quickly than the katana edge because it is protected and provided with the refractory clay layer, which keeps it more flexible. The cutting edge of the katana blade also becomes very hard due to rapid cooling.
Also, the hamon has now emerged and all the hataraki or liveliness in the sword blade. With some knowledge of Japanese swords you can now discover nothing or nothing . Nioi resembles the scent because of the fine little lines in the sample.
The properties that you can find on the surface of a sword often contribute to the sword school where you can classify a katana and are part of its signature.
Before being a mastersmith
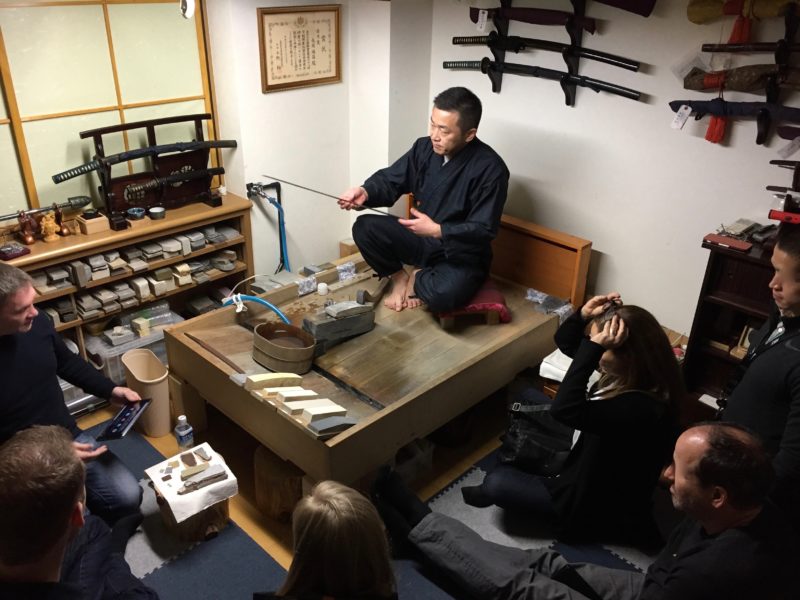
Fae 3: Polishing the katana blade
The Togishi is a professional sword polisher and a special craft form. These polishers first appeared during the Kamakura period (1185–1333). It was already important for the Japanese samurai warriors to keep their weapons in good condition and therefore to maintain them well.
During the Edo period, polishing became an art among the Togukawa clan. The purpose of the togshi is to bring out the design, quality and beauty of the leaf. The older antique nihonto were often polished with 3 types of stones, but during the Edo period seven polishing stones were usually used.
During the ji-togi the irregularities of the blade are removed. After this, the real polishing or shiage begins . This polishing is a lengthy process that can easily take several weeks. During this phase you can completely ruin a sword by disrupting the geometry of the blade, rendering it useless.
There are two phases in this process: the Shitaji togi or basic polish and Shiage togi or finishing polish .
In the shitaji togi, the emphasis is on the geometry of the sword blade and the complete straightening of the blade. The master blacksmiths work with water polishing stones that become increasingly finer in grain. These always remove the scratches from the previous stone, so that they are ultimately no longer visible to the eye.
There are also artificial stones that polishers work with today, but these are only used in the basic phase because the final results are less beautiful. Some stones are very rare and therefore extremely valuable.
During the finish or Shiage - togi, all sections or parts of the sheet are carefully examined and edited. The kissaki with yokote line is brought forward with nugui .
The hamon is now clearly accentuated with a style that the blacksmith assesses as to whether it is suitable for this katana . A commonly used style is with hadori stones, which makes the hamon lighter in color and creates clear accents. With the famous sashikomi nugui style, the entire hamon is worked with the hazuya stone. The next stone is the jizuya that will make the hada more visible. This will give the hamon a nice light color.
Japanese swords often have the back or mune and shinogi-ji mirror polished, and the center section and ha or edge often in a matte finish.
Step 4: Assembling the katana
After all these steps, it is now time to fully assemble the katana . The handle or tsuka is made with a core of wood surrounded by shagreen with a tight ito or wrapping of silk, cotton or leather. The tongs or nakago are firmly secured in this handle with two mekugi in the openings of the tongs. All parts of the koshirae are made , such as the menuki , fuchi and kashira , which give the sword its own unique appearance. The habaki is specially made to measure so that the blade can be properly placed in the sheath or saya. This is made of wood and beautifully finished with lacquer. Many samurai swords are initially supplied in shira -saya where the blade can be safely stored.
Making a katana is a complex process carried out by real craftsmen that creates a sword where art and a weapon come together. The blacksmiths are part of an age-old tradition where the sword represents “the soul of the samurai ”.